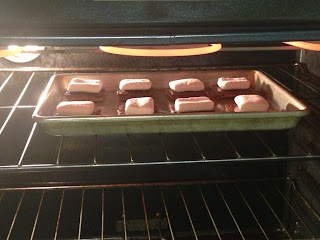
My family enjoys pasta night. One of the few dinners that EVERYONE actually enjoys.
In the last few months, we've picked up also serving a St. Louis delicacy: toasted ravioli.
Now we have had toasted ravioli before, but the 3 years we lived in StL, we learned how passionate the city & surrounding areas are about things like gooey butter cake & toasted ravioli.
Most of us enjoy the toasted ravioli. And we get a 4-cheese kind. Usually, we don't have any left over.
Well, in the midst of looking for "easy recipes", I came across a fake-out lasagna recipe. (recipe HERE) However, as a family who has to do what we can, purchasing & using a lot of organic just didn't work for us. And...I didn't want to fix up the ravioli, either. I needed something even easier...
So, after I studied the above recipe, I decided to pair down what could be done to achieve something close to the same thing. And I knew that the toasted ravioli went over pretty well...so...
Well...I cheated in a lot of ways!
But, here's what I did:
Ingredients:
~ 1 lb. ground beef
~ 1/8 C minced onion
~ 48 oz (or 2 24 oz) jar(s) red sauce (I used 2 jars Prego)
~ 40 oz (2 20 oz. boxes) toasted ravioli
~ 1 C shredded mozzarella cheese
~ 1 C shredded Italian-blend cheese
~ 1/4 C grated parmesan cheese, divided
Directions:
1. preheat oven to 400 degrees F
2. brown the meat & add the minced onion during browning; drain & rinse
3. while beef is browning, warm the red sauce on lo
4. once meat is rinsed, add to the red sauce, stir & simmer
5. spray a 9x13" dish or pan with cooking spray
6. spread a thin layer of the meat sauce covering the bottom of the dish/pan
7. place a single layer of the toasted ravioli, side-by-side, on top of the sauce layer
9. add a thin layer of both, mozzarella & Italian-blend cheeses, on top of the ravioli
10. Repeat steps 6-9 until you reach the top of the baking dish/pan (mine had 3 layers)
11. Add one more layer of sauce on top
12. sprinkle with half of the grated parmesan cheese
13. cover the dish with foil (use either non-stick or spray the foil with cooking spray)
14. place in the oven for about 45 minutes
15. remove the foil & place back in the oven for another 15 minutes (I placed on broil for about 5 minutes, but wished I'd done the extra 15...but we were in a hurry)
16. pull out the lasagna, sprinkle with the rest of the parmesan cheese & allow to rest for about 5-10 minutes
17. Serve it up
Yield: 6-8 servings
Take note that this dish is HEAVY! It's probably not good for you, either. But it turned out pretty darn good! And for my kiddos, who hate to try new things & have been dreading this dish, they actually were OK with this one! As a matter of fact, my youngest gave it a 7.8 out of 10! That's a big deal, yo.
My hubby was OK with it, too. He thought maybe the non-toasted version of ravioli might be better, but it was worth the try!
I was bracing myself for it being a "You'll eat it & you'll like it!" kind of meal. But I didn't have to force anyone! Just coaxing them to try it first was the only big step my kids needed!
Plus, my StL friends might find this one interesting with a take on toasted ravioli! And I cannot believe how easy it really was!
Hope you like it, too!
Also, for a vegetarian version, you can leave out the meat, just use the cheese ravioli, and make sure to use a heavy-on-veggie sauce (like one with mushrooms).
In the last few months, we've picked up also serving a St. Louis delicacy: toasted ravioli.
Now we have had toasted ravioli before, but the 3 years we lived in StL, we learned how passionate the city & surrounding areas are about things like gooey butter cake & toasted ravioli.
Most of us enjoy the toasted ravioli. And we get a 4-cheese kind. Usually, we don't have any left over.
Well, in the midst of looking for "easy recipes", I came across a fake-out lasagna recipe. (recipe HERE) However, as a family who has to do what we can, purchasing & using a lot of organic just didn't work for us. And...I didn't want to fix up the ravioli, either. I needed something even easier...
So, after I studied the above recipe, I decided to pair down what could be done to achieve something close to the same thing. And I knew that the toasted ravioli went over pretty well...so...
Well...I cheated in a lot of ways!
But, here's what I did:
~~~~~~~~~~
LAZY LOU LASAGNA
Ingredients:
~ 1 lb. ground beef
~ 1/8 C minced onion
~ 48 oz (or 2 24 oz) jar(s) red sauce (I used 2 jars Prego)
~ 40 oz (2 20 oz. boxes) toasted ravioli
~ 1 C shredded mozzarella cheese
~ 1 C shredded Italian-blend cheese
~ 1/4 C grated parmesan cheese, divided
Directions:
1. preheat oven to 400 degrees F
2. brown the meat & add the minced onion during browning; drain & rinse
3. while beef is browning, warm the red sauce on lo
4. once meat is rinsed, add to the red sauce, stir & simmer
5. spray a 9x13" dish or pan with cooking spray
6. spread a thin layer of the meat sauce covering the bottom of the dish/pan
7. place a single layer of the toasted ravioli, side-by-side, on top of the sauce layer
9. add a thin layer of both, mozzarella & Italian-blend cheeses, on top of the ravioli
10. Repeat steps 6-9 until you reach the top of the baking dish/pan (mine had 3 layers)
11. Add one more layer of sauce on top
12. sprinkle with half of the grated parmesan cheese
13. cover the dish with foil (use either non-stick or spray the foil with cooking spray)
14. place in the oven for about 45 minutes
15. remove the foil & place back in the oven for another 15 minutes (I placed on broil for about 5 minutes, but wished I'd done the extra 15...but we were in a hurry)
16. pull out the lasagna, sprinkle with the rest of the parmesan cheese & allow to rest for about 5-10 minutes
17. Serve it up
Yield: 6-8 servings
~~~~~~~~~~
Take note that this dish is HEAVY! It's probably not good for you, either. But it turned out pretty darn good! And for my kiddos, who hate to try new things & have been dreading this dish, they actually were OK with this one! As a matter of fact, my youngest gave it a 7.8 out of 10! That's a big deal, yo.
My hubby was OK with it, too. He thought maybe the non-toasted version of ravioli might be better, but it was worth the try!
I was bracing myself for it being a "You'll eat it & you'll like it!" kind of meal. But I didn't have to force anyone! Just coaxing them to try it first was the only big step my kids needed!
Plus, my StL friends might find this one interesting with a take on toasted ravioli! And I cannot believe how easy it really was!
Hope you like it, too!
Also, for a vegetarian version, you can leave out the meat, just use the cheese ravioli, and make sure to use a heavy-on-veggie sauce (like one with mushrooms).
ENJOY!


