Thursday, July 31, 2014

Traditional Irish Soda Bread - Lazy Cooker

I'm all about getting traditional foods right. Like Irish food.

I have done some Irish & semi-authentic Irish fare (click HERE for recipes), and I had the itch to fix up a meal again. Yes, in July.

Now then, the last couple of St. Paddy's Day meals haven't included Irish Soda Bread for one reason or another. But I now have a solution! Make it in the lazy cooker!!

You cannot imagine how stoked I was to find some recipes for the lazy cooker. But most of them had the recipe ingredients WRONG! Irish Soda Bread is a mere 4 ingredients. It is said that if you add eggs, it's cake; if you add sugar, it's cake; if you add butter, it's probably cake. So I took the simplest & traditional recipe and did this:

~~~~~~~~~~


IRISH SODA BREAD
Traditional Recipe - Lazy Cooker


Ingredients:

* 4 C all purpose flour, plus some extra
* 2 tsp baking soda
* 1 tsp salt (table, kosher, sea - I used sea salt)
* 2 C buttermilk (or 2 C milk with 2 T vinegar - let set for 5-15 minutes before using)


Directions:

- In a large bowl, mix the 4 C flour, baking soda & salt together

- Make a well in the dry ingredients, and pour in the buttermilk

- Stir it all together until it is a sticky ball of dough

- Take the dough & place it on a flat & lightly floured surface (this is the extra flour)

- Lightly knead the dough into a ball & slightly flatten

- Lightly spray the insert of your lazy cooker with cooking spray
          + NOTE: you can also lightly spray or grease a pan if it fits into your lazy cooker.
                          Check out the fit first, but the pan isn't needed.
                          Also, I used an older, round lazy cooker. Most are oval now & can be used.

- Place the dough ball into the lazy cooker

- Take a knife & make 2 long cuts, forming a cross on top of the dough ball, extending over the edges; make the cuts about a half to 1 inch deep

- Place the lid on the lazy cooker, make sure it's plugged in & set on low for 1 hour
- After 1 hour on low, turn the lazy cooker setting to high for another hour to hour & a half
(Or you can set on low for 4 hours)

- Turn off the lazy cooker, and carefully remove the bread from the lazy cooker insert onto a cooling rack or plate & allow to cool for a short time (you want to serve the bread warm)

- Serve 

* Can easily serve 8-10

~~~~~~~~~~


A couple of other recipes I had come across called for 1 & 3 quarters cups buttermilk. It wasn't enough & wish I had bumped it up to the 2 cups, so I put it in this recipe. 

You know what? This was a HUGE hit! My kiddos couldn't get enough of it, my hubby loved it, my parents couldn't get over it, and I was so stoked with how it turned out!! The texture was divine & was perfect for the meal.


SO simple, people! Nothing to complicate anything. Easy recipe, and let the lazy cooker do the rest. You will NOT be disappointed!

And I can now be sure to work it into my future St. Patrick's Day feasts. I'm delighted!

ENJOY!

Thursday, June 12, 2014

Easy-Parm Cheesy 15-Minute (or less) Meal

We had just come back home from a long weekend out of town the afternoon beforehand. We hadn't been to the store yet. There was nothing for dinner. Oh yeah...we were short on time as it was getting fairly late. Plus, my hubby had a meeting to be at that evening. Time was short & of the essence!

I decided I would head to the store & figure out something I might be able to do quickly. Pasta is a pretty good dinner to fit that, and the kiddos are all OK with that meal, too. So, I went shopping.

Since we try to save money, too...I headed to our local Walmart. *sigh* You know what? They were out of several things we would usually have with our bi-weekly pasta dinner. Figures. I'd already picked up many of the items, so I didn't want to put everything else back. We would use it eventually. So, even in my exhausted, welcome-back-to-reality state of mind, I had to think quickly of what I could get that I could throw together & make sure the whole family had SOMETHING! And the brain wheels began to turn...

Knorr's has started touting using their side products as main dishes. Just a few additions, badda-bing, badda-boom, badda-dinner! We have Knorr's Sides often enough & really like them! Plus...they are only $1.00 per package at Walmart. So, I stuck with the pasta idea & got the Parmesan version of the side. And then I built up a speedy quick meal that was pretty, delicious, pretty delicious, and FAST!

Here's what I did:


~~~~~~~~~~


EASY-PARM CHEESY 15-MINUTE (or less) MEAL
(from start to finish)


Ingredients:

~ 2 pkg Knorr's Pasta Sides: Parmesan
~ 1 pkg smoked sausage, sliced (we used turkey with a non-pork eater)
~ 1-2 red bell pepper, rinsed, deseeded & thinly sliced *
~ 1 bag green beans (to be steamed, so we got pre-packaged for time)
~ 1 loaf Italian bread from the bakery


Directions:

Read directions on the package of Knorr's; since using more than one package, use slightly less of water & milk asked for (I used 3 packages, so I tried to adjust as such)

Slice the sausage, into about 1/2 inch slices, and slice the bell pepper into strips

When placing the liquid in the large pot to begin boiling, keep an eye on it while preparing other to fix the other ingredients

Start heating a large skillet on the stove & place a table spoon of olive oil or spray with olive oil cooking spray to coat

Turn your oven on the high setting of broil, and * place your bell pepper strips in one layer on a lightly sprayed baking sheet, drizzle with olive oil & sprinkle with sea salt (or table salt if you don't have sea salt)

Prepare to get your green bean bag into the microwave

By now, your liquid should be boiling, your skillet should be good & hot, and your oven should be ready...

Open your Knorr's envelops & empty them into the boiling liquid, stir and let sit, but make sure to stir once in a while so the pasta doesn't stick to the bottom of the pot

Place the sausage slices into the skillet for a couple of minutes. Turn them once in a while being careful not to burn them.

Put the baking sheet of bell peppers into the oven to roast for just a few minutes; turn on the oven light to keep an eye on them to make sure they don't get too dark...but you want them deliciously tender

Start your microwave & steam those green beans for about 7 minutes


OK...everything is good & going now! The pasta, sausage, peppers & green beans have all been started about the same time!

Take these 7-ish minutes to slice your bread to the thickness you desire. Unless you bought pre-sliced. If that's the case, it's one less step!

After about 5 minutes, your pasta may be good & tender (check to make sure); remove from the heat, give a quick stir & allow to set for a couple of minutes.

When the green beans are done (you'll know with the microwave probably telling you), you can turn off the heat to the skillet & pull out the bell pepper strips from the oven.

Guess what? BOOM! Dinner is DONE! The meal is ready to serve: Plate it up with a few sausage on the pasta (or you can mix them together), get some peppers & green beans on that plate, and then add a slice of bread. Bing-Bang-Beautiful!

~~~~~~~~~~

It seems like a lot going on up there, but prep time probably only takes 5 minutes & you can have everything else done & served up in the next 10 minutes! You may not even need the whole 15 minutes! I even made a gallon of stove-brewed tea in that time, too!

And, it's not horrible for you, either.

It smelled great, it tasted great & there were hardly any leftovers! I think it was a winner-winner-pasta dinner!!

I'm now excited to play with some more of Knorr's sides to see what I can make for another speedy-quick dinner!

Game On!

ENJOY!

Friday, March 28, 2014

An Irish & Irish-Like Feast

When St. Patrick's Day rolls around, I do try my best to serve up something that is authentic to Irish cuisine...or at least Irish-like.

I'm not sure why Americans cannot seem to grasp that corned beef is NOT Irish, but it has to stop!

I have had people shocked that I don't like corned beef. They figure if you have Irish decent within you, then you should enjoy some corned beef. Sorry folks...that stuff makes me gag. But I can enjoy some serious potatoes!

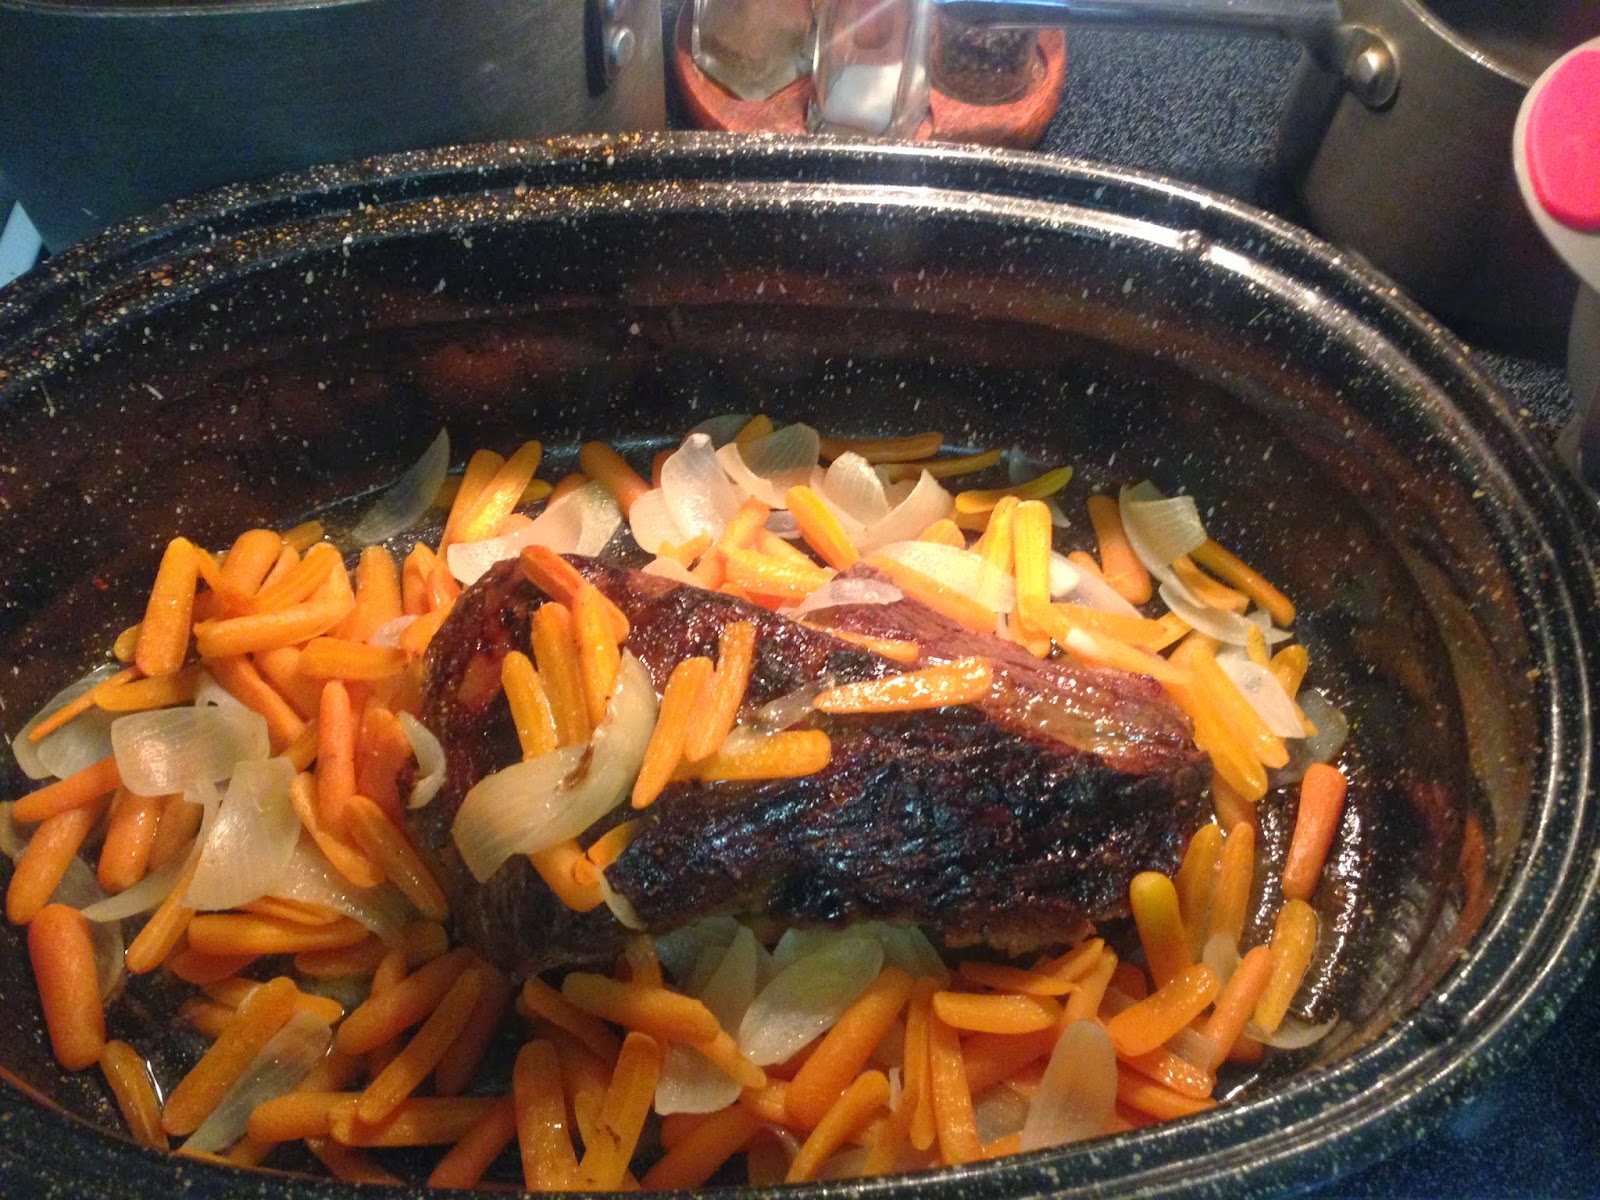
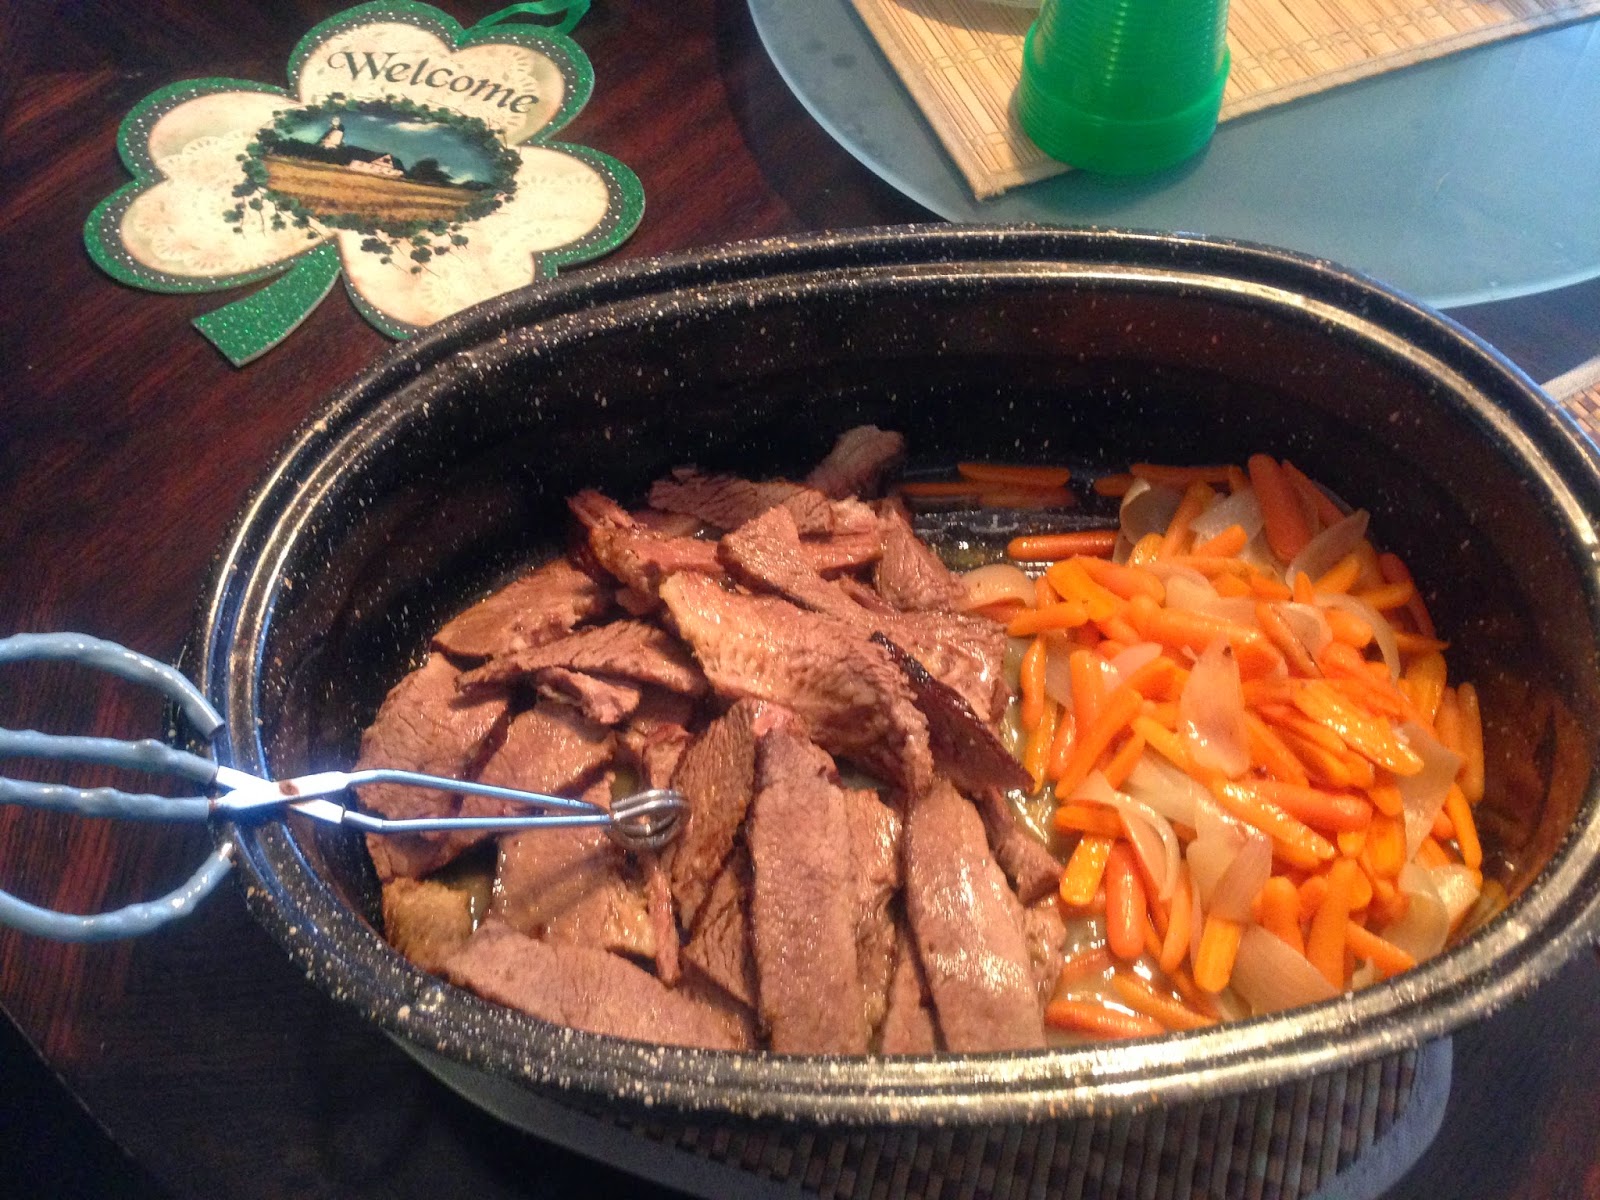
However, when St. Paddy's Day rolled around, I have been searching for a recipe to fix that everyone will actually enjoy. Much of the meat eaten in Ireland is generally pork or lamb. I haven't found a lot of lamb around here, and we have a non-pork eater. So I had to revert to beef. Not corned beef, but a good brisket. I know beef is more rare, but I found this Irish-pub style orange beef recipe that I was hoping would go over. (recipe HERE)


You know what? We only had 2 slices of beef left...so the dog got to enjoy some St. Paddy's Day fare, too! I think I want to add a bottle of Irish ale to the liquid in the cooking process, next time, for an added layer of Irish flavor.

~~~~~~~~~~

I also made some colcannon for the first time! And I did mostly use this recipe, HERE, that I found. But I did change up a couple of things, so here's what I did with the colcannon:


IRISH COLCANNON

Ingredients:

3 lb Yukon or buttery potatoes (I found golden butter potatoes)
1/2 C cabbage slaw mix (mine included green cabbage, red cabbage & carrot)
1/4 C kale leaves, chopped or torn into pieces (I've also used turnip greens)
2 T dried chives
1 stick butter
1/4 C buttermilk
sea salt
white pepper


Directions:

~ Rinse & lightly scrub potatoes

~ Cut each potato into 6-8 cubed pieces - I left the skins on for texture & as a time-saver ( like the more rustic feel & look, anyway)

~ Place the pieces into a large pot, cover with water

~ Bring the water to a boil & then turn down to simmer until potatoes are tender

~ When potatoes are tender, drain the water & transfer potatoes to sprayed lazy cooker insert

~ Add the other ingredients to the potatoes in the lazy cooker, close the lid & set on high for about 2-4 hours

~ After 2-4 hours of cooking, lightly smash & stir the potato mixture until blended, but still chunky

~ Serve


I want to tell you that this has a taste like a loaded baked potato. Just add some bacon bits & cheese...and BOOM! Loaded smashed potatoes! These were a total hit! I was SO happy with how it turned out.

~~~~~~~~~~

I also offered up some slaw. I have tried to modify a tried & true sweet slaw recipe...but it never turned out quite right.

Since we were having some family over to enjoy the meal, I decided to have 2 slaws on hand. We found a great KFC copycat recipe on Pinterest (recipe HERE), and I have since handed it over to my daughter to make. She does a GREAT job with it!

But I know there's a mustard-dill slaw that is very Irish. So I found a very workable slaw recipe (HERE) to make a non-sweet slaw. And I did make my own modifications, plus I didn't need as much as the recipe called for.

Sweet KFC copycat slaw, above; mustard-dill-vinegar slaw, below
MUSTARD DILL VINEGAR SLAW

Ingredients:

1 bag cabbage slaw mix
1/8 C minced onion
2 T garlic powder
3/4 C Miracle Whip with olive oil
1/4 C French's honey dijon mustard
1/4 C distilled white vinegar
1/4 C apple cider vinegar
3 T white wine vinegar
3 T buttermilk
1/4 t sea salt
1/4 t freshly ground black pepper
1/8 t celery seed
2 T dried dill weed


Directions:

~ In a large bowl (preferably with a tight lid), place all ingredients except the slaw mix, stir well

~ Add in the slaw mix to the bowl

~ If you have a lid for the bowl, close the lid & shake it up very well
~ If you do not have a lid for your bowl, mix with a large spoon very well & then cover with foil or plastic wrap

~ place in the refrigerator for at least 2 hours before serving...but is better if done a day before

~ Serve


I placed my slaw in a great pottery dish that I used for my Irish Bread & Butter Pudding (recipe HERE). It was actually very good! If you do not like a sweet slaw...try this one!! It has pretty good bite to it, too!

~~~~~~~~~~


I was truly disappointed that I did not have time to make traditional Irish soda bread. Something had to be cut when I tried to make some oatmeal cookies. Something went horribly wrong with the cookie recipe, apparently, and they melted all over the inside of the oven. I had to stop baking operations to cool & clean the oven, so it cut into times to get food done. I was bummed!

~~~~~~~~~~

Irish Cream Apple Cake & Erin's Lush Pie


However, I had to make dessert! So I did my Irish-inspired apple cake (recipe HERE) & the glaze (recipe HERE) to go with it. But I, also, wanted to make my mom's tried & true St. Patrick's Day dessert go-to. I've seen it listed places as Pistachio Pudding Dessert (or something along those lines), but I grew up with it being called Erin's Lush. However...I had no time to bake the crust. So...I cheated it a bit & made it into a pie!


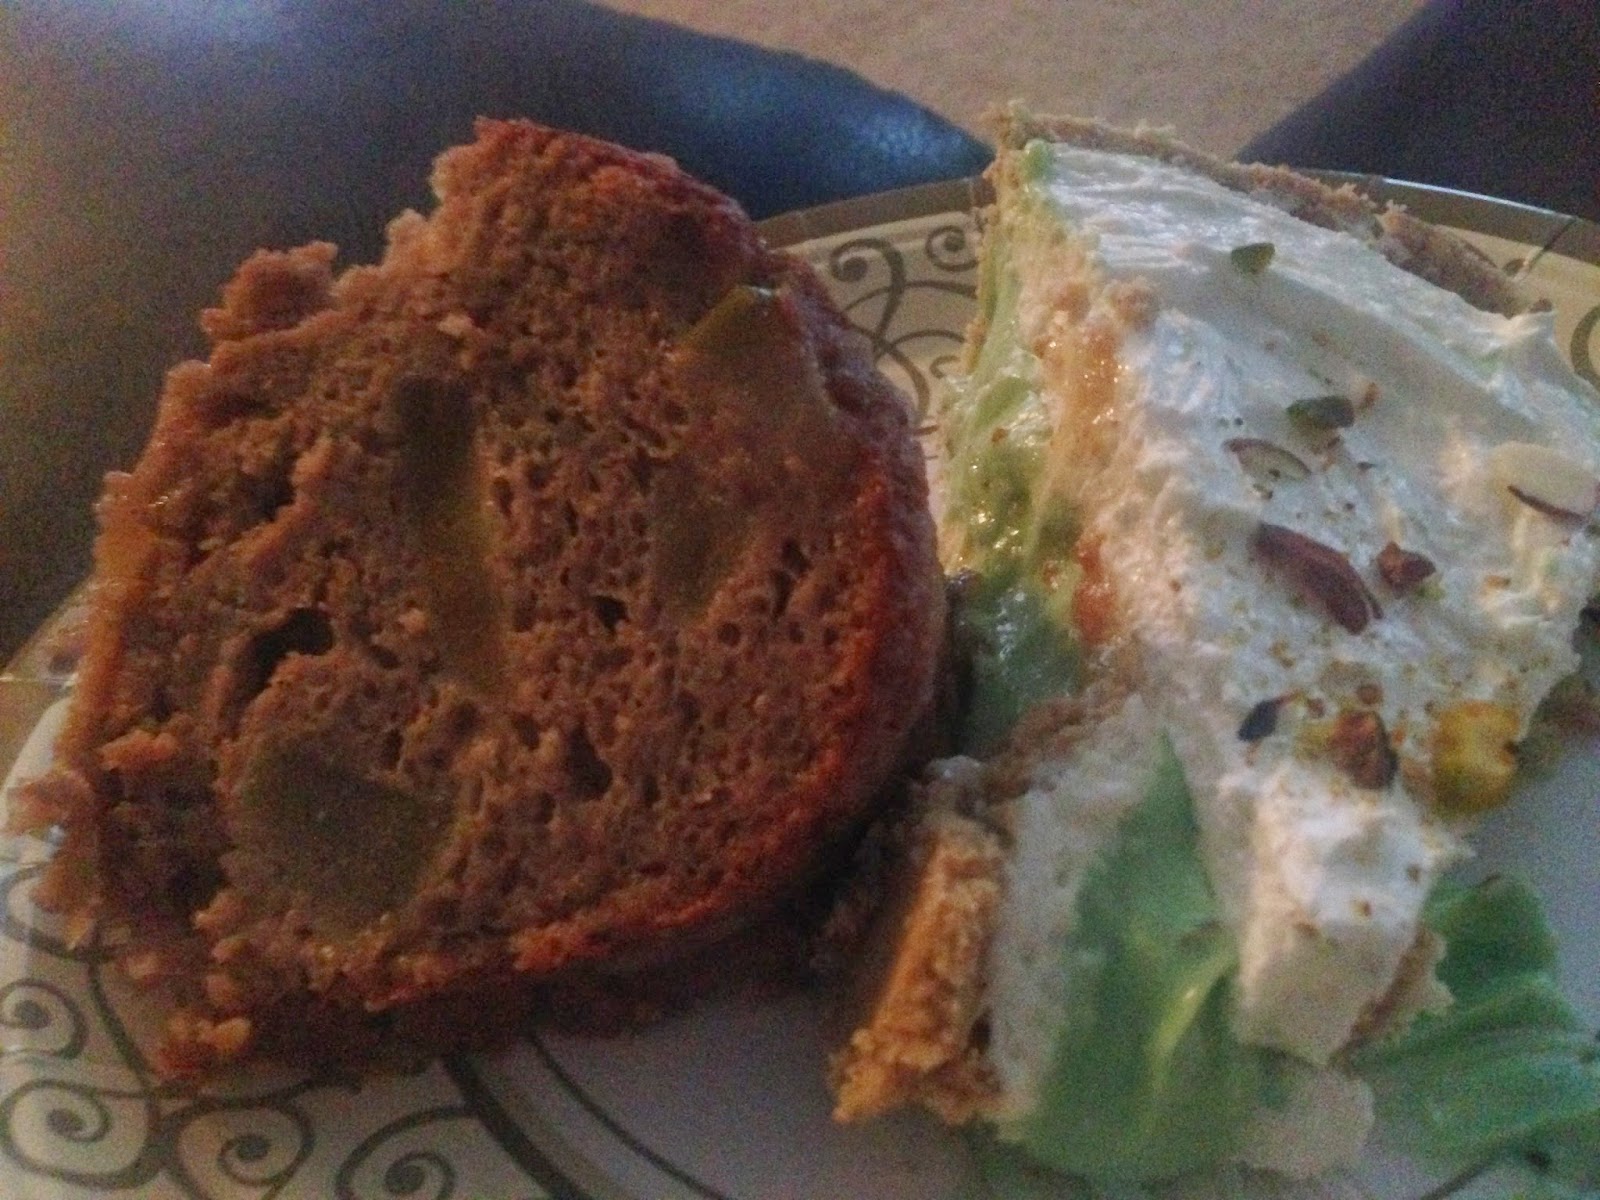
Slice of Irish Cream Apple Cake & a slice of Erin's Lush Pie


ERIN'S LUSH PIE


Ingredients:

1 large pre-made graham cracker crust
2 small packages pistachio pudding mix
2 C Irish Cream Creamer
1 8 oz cream cheese brick, softened
1 8 oz tub whipped topping, divided
1 C powdered sugar
2 T crushed pistachio nuts, divided
1 T almonds sliced


Directions:

~ In a bowl, mix the cream cheese, powdered sugar & 1 C of the whipped topping together

~ along the bottom of the graham cracker crust, sprinkle about 1/2 of the crushed pistachio nuts

~ Carefully spread about 1/2 - 3/4 of the cream cheese mixture, evenly, on the bottom of the crust (if some of the nuts get mixed with the cream cheese mixture, it is fine)

~ In a separate medium-sized bowl, whisk both pistachio pudding mixes & the Irish cream creamer well, for about 2 minutes

~ Carefully add the pudding mixture on top of the cream cheese layer in the graham crust

~ Add what is left of the whipped topping with what is left of the unused cream cheese mixture & blend together

~ Carefully spread the whipped topping mixture on top of the pudding layer in the pie crust

~ Take the almond slices & what is left of the crushed pistachio nuts & evenly sprinkle on top of the whipped topping layer

~ Refrigerate for at least 2 hours before serving to allow to fully set

~ Serve


This pie is so decadent & fantastic! I did use pistachio nuts because of the pudding & they are green in color. I also used almond slices because they are my favorite. You can also use pecans &/or walnuts, instead.

This was SO good! And so easy!

~~~~~~~~~~


Some of the 21 & over aged kids did enjoy some Irish Ale from Boulevard, too.


I hope this has inspired your future Irish meals. Open your minds a bit & know you don't have to eat green potatoes with corned beef & cabbage to be considered an Irish meal.


I have a few other things that are Irish or Irish-inspired, HERE, also.

ENJOY!

Wednesday, March 12, 2014

Apple Irish Cream Cake Glaze

I always look forward to when I get to make my Apple Irish Cream Cake (recipe HERE). And I usually leave it alone since it's so pretty by itself...

Well, with St. Patrick's Day rolling around again, and we have a group coming to our house tomorrow night, I thought I'd make the cake for them.

As I did the cake this time, I realized something:
there is some ooey-gooey goodness from the apple slice marinade left in that bowl! So I decided I should use it! I decided to to make a glaze for the cake with it!

Here's what I did:

~~~~~~~~~~


IRISH APPLE CREAM CAKE GLAZE


Ingredients:

(leftover from the mixture from the apple marinade in the cake recipe)

1/4 C brown sugar
2 T apple pie spice
2 t lemon juice
1 t honey or agave
1 t buttermilk
1/2 t vanilla extract (optional)
1/2 t almond extract (optional)

     Also:
1 C granulated sugar
1 C powdered sugar


Directions:

~  after soaking & using the apple slices from the marinade mixture, heat the liquid in a small sauce pan on the stove until it comes to a rolling boil. Allow to boil for about a minute & then reduce to a simmer for just a moment, then remove from heat. Stir it up.
OR
You can have liquid in a microwave-safe bowl, and heat the liquid on highest power for about 1 & a half to 2 minutes. Remove from the microwave & stir.

~ Add in the granulated & powdered sugar until completely mixed.

~ Once cake is completely cooled, drizzle the glaze over the cake.

~ Top it with a shimmy-shake of powdered sugar

NOTE: You can also keep glaze on the side to top off 1 piece at at time as it's served

~~~~~~~~~~

I plan to be making this on St. Patrick's Day again, too. Plus I'm looking forward to fixing up another Irish feast. Stay tuned for some of the other dishes! (check out my Irish fare HERE)

Hope this helps you in planning & inspiration, too!

ENJOY!

Thursday, February 20, 2014

Hot Chocolate Cool Whip Cookies

There's not a lot of back story to these cookies...

I was browsing Pintrest & found a lot of recipes for Cool Whip Cookies. Most of them were strawberry or lemon, but several said you could use any flavor.

As I got looking at what I had in the pantry to use...this is what I did:

~~~~~~~~~~


HOT CHOCOLATE COOL WHIP COOKIES


Ingredients:

~ 1 box hot chocolate cake mix (or a light chocolate flavor)
~ 1 8 oz. container Cool Whip (or whipped topping)
~ 1 egg
~ powdered sugar

~ optional 1/2 cup dehydrated mini marshmallows if using light chocolate cake mix


Directions:

* Preheat oven to 350 degrees F

* in a mixing bowl, pour in the cake mix, , the marshmallows (if using), the whipped topping & the egg; mix all together very well

* in a separate bowl (I suggest one with a lid), pour in some powdered sugar

* with a spoon, scoop out about a 1 to 1 & half inch blob of batter & place it in the powdered sugar bowl; cover the batter blob with the powdered sugar

* on a lightly greased or parchment paper-lined cookie sheet, place each powdered blob on the cookie sheet, about 2 inches apart

* place in the oven for about 10-12 minutes (original recipe I used called for 8-10...but 12 worked great for these)

* when time is up, pull the cookies out & allow to rest for about 5 minutes then may CAREFULLY move to cooling rack for a few more minutes; COOKIES WILL BE VERY SOFT


Yield: about 2 dozen

~~~~~~~~~~


If you eat them while they are warm...they are SO good!! If you eat them later...they are SO good!

These will probably be the easiest cookies you will ever make! They are soft, light & delicious!

The cake mix I used was a hot chocolate cake mix that already had the marshmallows in it. If you use a light chocolate flavored mix & don't want the marshmallows, then that is fine.

I tested these with strawberry & white chocolate chips. Since it was my first time to mess with the recipe, I made the blobs too big, I was apparently out of powdered sugar & used granulated sugar to coat the cookies with, and I used the 8-10 minute time frame. The cookies came out falling apart, big & piecey...but they tasted like a strawberry milkshake! My hubby couldn't get enough of them! But he said the white chocolate chips weren't needed...I liked 'em, but whatever...

Now the hot chocolate ones have a bit of chocolate milkshake kind of taste when cooled down, too.

Oh! And now that the powdered sugar is in the storable container...you can use it for the other flavors you might want to make...

Now, I may be addicted to making these in all kinds of flavors...I want to try lemon lavender soon...

...did I mention they are very soft?

ENJOY!

Sunday, January 26, 2014

Pantry Who Hash - Lazy Cooker

Almost a year ago, I did Roast Beast Who Hash (recipe HERE) for Dr. Seuss' birthday. I made it after realizing no one else had a recipe for an actual Seuss-based hash! So, I had to come up with something!

As it turned out, my family actually kind of liked it! SCORE!

And then I was so excited when my hubby wanted me to make a version of it for Halloween! So...after some thought & and his considerations, I made a couple of slight changes to make it Beastly Boo Hash (recipe HERE).

I don't make it too often, but it was really awesome when my kids were so pretty OK when I needed a lazy cooker meal for a busy Sunday & I decided to pull out the Who Hash. YEA!

But I thought I'd bring it down a bit. I was out of cider (*ugh*) & needed to save some money, plus I figured I needed to try to pull more of what was in the pantry than going out to get specific things...

So...here's what I did (and my line of thinking):

~~~~~~~~~~


PANTRY WHO HASH - LAZY COOKER


Ingredients:

2 lbs ground beef, brown & mostly drained
1/4 C minced onion OR 1 small onion, diced
1 lb potatoes, quartered (including a small sweet potato in about 1 inch pieces)
4 C bell pepper (any or mixed color), diced OR frozen bell peppers
1/2 C water
1 envelope onion soup mix
1 envelope ranch dressing mix
1 envelope apple cider mix
1 T liquid smoke (optional)
3 T worchestershire sauce
2 beef bouillon cubes
approx. 1/2 bag of frozen hash browns


Directions:

Brown meat in a skillet, add the onions (I used dried minced onions), drain & allow to set. I didn't rinse mine to keep in more flavor, but you may rinse it to keep it on the healthier side, if desired.

Spray the inside of the lazy cooker insert.

Add the meat & the veggies (I used fresh bell pepper, but usually have frozen pepper strips on hand).

Pour the water over the meat & veggies.

Empty the onion soup mix, ranch dressing mix & cider mix envelopes to the lazy cooker.

Add in the liquid smoke (if using) & the worchestershire sauce.

Place the bouillon cubes in with the other ingredients.

Give a good stir, then close the lid & allow to simmer on low for 6-8 hours.

An hour before serving, add in the hash browns, stir & allow to cook on low for another hour.

Serve.

~~~~~~~~~~

If you use mostly frozen & dried ingredients, there is very little work involved! Just browning up the meat & cutting up potatoes would be the closest grunt work for the meal.

You can fry up an egg to place on top, if you'd like...or just get ready to serve it with your favorite bread.

And, just another way to change up your Dr. Seuss celebration or your Halloween meal...plus makes it even easier!

You're welcome.

ENJOY!

Thursday, January 23, 2014

Scandinavian-Inspired Almond & Cardamom Cakes

I have been on this Scandinavian kick, lately. It all came from doing some research on Leif Ericsson Day, which I missed celebrating this last year, but I wanted be ready for the next time around.

As I had been researching...like I do...I started getting drawn to some of the foods & decor. I also discovered St. Lucia Day, and in researching, will be better prepared for next time around for it, too.

But I digress...

I have taken a liking to the Scandinavian culture & finding out about it. However, I am not Scandinavian at all (I don't think)...but I'm taking on some of the dishes like I have with my Irish dishes (find recipes HERE), but I do have a lot of Irish in me.

Again...I digress...

I took on some baking a few years ago, and really took a hold of the cupcake. But I would play with cake mixes. I've done a couple from absolute scratch, but if I can have a base already, just use it & expound upon it! Right?

Now, if you remember, I discovered the Scandwich, and have been playing, in a near obsessive manner here lately. (see what I've done HERE) But I wanted to try some of the desserts. I've cheated some pastries, but I wanted something different!

Now, I've got some bundt cake pans that I love making breads & cakes with...because they turn out so pretty! They are already presentable, or near presentable, just as they are right out of the oven. *sigh*

Quite some time back, I saw a pan with a set of 6 smaller bundts. So cute! It was like 6 top tiers of a wedding cake...but in bundt form! I really wanted a pan or two of these. Then, because it's my brain we are talking about here, I thought about calling them "baby bundtings"! hehe

So, I had asked for a pan or 2 on my Christmas wish list for the last couple of years. Imagine my surprise when I received a pan that contained 12 tiny bundts! *SQUEEE* I didn't know they made 'em so little! Then, later on Christmas...I got another one! I was so excited!!!

Cake mixes generally make about 24 cupcakes. I now had 24 itty-bitty baby bundtings so I could bake a whole batch at once! Woo Hoo!!

So, I started researching Scandinavian cakes to make...and hopefully, since there's a company called Nordic Ware (so fitting though the pan shape is not Nordic), I thought they were a perfect match...so I matched 'em up!

After doing some research & with my preference of cake mixes, I made some Baby Bundtings out of this:

~~~~~~~~~~


SCANDINAVIAN-INSPIRED 
ALMOND & CARDAMOM CAKES


Ingredients:

Baby Bundtings
1 box Pillsbury Traditional Vanilla cake mix
5 eggs
3 sticks butter, melted
1 1/4 C milk
2 tsp almond extract
2 tsp ground cardamom

Glaze Topping
1 C granulated sugar
1/4 C milk
1/2 T vanilla extract
1/2 t almond extract
sliced almonds


Directions:

Preheat oven to 350 degrees F

In a large bowl, put in the cake mix, eggs, butter, milk, almond extract & cardamom

With a standing mixer or hand-held mixer, mix all of these ingredients together until very well blended & completely moist

In your mini bundt cake pan (or cupcake/muffin pan), spray rub down with butter or shortening & flour, or spray with a cooking spray that has flour in it; I used the spray
* If you are using a cupcake pan, you can just use cupcake liners, if desired

Fill each space 2/3-3/4 full

Place the pan(s) into the oven & bake for about 18-23 minutes (depending on your oven), or until golden & a toothpick comes out clean

Once done, pull out of the oven & allow to cool for 10-15 minutes before removing from the pan (if using the mini bundts); if using a regular cupcake pan, allow to cool for about 5 minutes before removing from the pan

While cooling, in a small bowl, pour in the sugar, milk, and vanilla & almond extracts and stir well, until the sugar is dissolved; add in more sugar or milk until you have your desired consistency - and set aside

When cooled, remove from the pan & place each small cake into a cupcake liner (if not already in one)

Take a small spoon & begin to drizzle the glaze over each small cake

Sprinkle a few sliced almonds on top of each cake

Serve

Yield: up to 24 mini cakes/cupcakes

~~~~~~~~~~

Aren't they adorable? I was so happy with how they turned out! I used cupcake liners that resembled a Scandinavian-type pattern to give it a certain je ne sais quoi to match the feel. But you can, of course, use any you'd like.

You could use it as one big bundt cake, too, if you wanted.


As I was "testing" them (*wink-wink* someone's gotta do quality control), I realized how delicious they would be with a cup of coffee! What a great after dinner finisher! Or even after lunch...

ENJOY!

Monday, January 13, 2014

Smokey Mexi-Mocha Chili

My hubby makes great chili! I know a lot of guys (even gals) claim they have the best, but my hubby's is kind of different & so good. He makes a chili that's sweet & spicy.

OK...he tones down the spicy so I can eat it, but he puts in his own special ingredients. And I'm a sucker for the sweeter side of foods. Creamier, too. And his chili is more of a stoup (a Rachael Ray term for "thicker than soup & thinner than stew"). It's got a good, bold flavor that is sweet & savory.

It's important to know this about my hubby's chili, but let's jump to my own  ingredient search:

I love chocolate. No really...I. Love. Chocolate. And I will try all kinds to see if it's to my liking or not. One day, as I was searching the candy aisle at the grocery store, I discovered something that began my brain's wheels to start turning on overdrive. Lindt has a dark chocolate bar that contains chili pepper in it! Did you know that? And I questioned why...

Quite some time later, I learned that there are people who have added cocoa to their chili recipes. wha-WHA?? I know, right?

Then I got thinking about that chili chocolate bar from Lindt...
I had already been adding a square of it to my Spicy Mexi-Mocha (recipe HERE).

My hubby has talked about trying a Tex-Mex seasoning in his chili, and I remembered him saying that...so I got thinking about the whole spicy chocolate in chili, much like my Mexi-mocha. And, mocha includes coffee...so I thought I'd throw in some coffee, too! Because...well...I also LOVE coffee!! I. Love. Coffee.

Then a friend of mine put her vegan chili recipe out there. Imagine my shock when it, too, included coffee!! Since then, I had seen where a couple of chili recipe demos, on news segments, that also included coffee.

But...none of those recipes had included both chocolate AND coffee!! I had even tried to research other recipes that had those ingredients. Guess what I found! Nada...nothing...zip...zero. So, I was on my own.

I also love a smokey flavor to my chili, along with a lot of other soups & meats. So I thought I'd include it here, too.

So, after some research of spices & other chili recipes, and finally getting all the ingredients I needed for what I wanted to use, here's what I came up with:


~~~~~~~~~~


SMOKEY MEXI-MOCHA CHILI


Ingredients:

1 lb ground beef or turkey; browned, drained & rinsed
1 14.5 oz cans diced fire-roasted tomatoes

1 small can tomato sauce
1 small can tomato paste
1-2 can(s) black beans, drained & rinsed
1 can corn, drained (I used a can with no salt added)
1-2 sweet red bell pepper, deseeded & diced
1 beef bouillon cube
1½ cup dark roast/strong coffee, brewed
½ cup minced onion or 1 small sweet yellow onion, diced - divided
½ chili dark chocolate bar; broken into much smaller pieces

3 T cumin
2 T parsley
2 T oregano
3 T flour
3 T cinnamon
1 T nutmeg
1cup brown sugar
2-3 T vinegar
3 T liquid smoke
3 T smoked paprika
3 T chili powder
3 pinches ground cayenne pepper
1 pinch red pepper flakes
garlic powder to taste
3 T honey
3 T vanilla extract
½ tsp anise extract (you seriously don't want too much of this, but just enough to give umph)
2 tsp cardamom
2 T each: unsweet cocoa & dark cocoa
2 T sugar
1 T salt
1 T ground black pepper


Directions:

~ in a large pot, brown meat thoroughly, adding half the onions; drain, rinse & add back into the pot

~ turn heat to mid-high heat, then add the beans, corn, bell pepper, the rest of the onions, and tomatoes (sauce, diced & paste) to the meat; stir

~ add in the coffee, liquid smoke, honey & extracts, then stir

~ begin to add all the other ingredients, stir & allow to simmer for 20-30 minutes

~ stir again & take a test taste to figure out where you might want to adjust seasonings & such, depending on how spicy, sweet &/or smokey you want it, then allow to simmer again to get those flavors all blended


* if you cannot live without a couple shimmy-shakes of tabasco sauce or chipotle seasoning, put it in...they are very fitting for this dish
* serve with cornbread or tortilla chips; sprinkle the top with cheese &/or sour cream, if desired
* use it as a hearty dip at your next fiesta
*serving suggestion: ladle the chili into a pottery mug (or any mug)...cuz...mocha should be in a mug

~~~~~~~~~~

This a different, yet yummy flavor for a chili. Perfect for a cold night (cuz...uh...chili) &/or for something like Cinco de Mayo, Dios de los Muertos, or even a different twist to for your Navidad fiesta...or any other night.

There are some surprising ingredients in this chili, but I really did take lead from my hubby's chili & a yummy Mexi-mocha. I even used the mocha idea as the basis for my Mexi-cocoa cake, too (recipe HERE)!

I mean...in ancient times, cocoa was mixed with spices & peppers before sugar & cream. So this is right on track with all of that!

As for the pepper, you can also mix it up by adding orange &/or yellow to make it more festive, too.

ENJOY!

Thursday, January 2, 2014

Scandinavian-Style Open-Face Sandwiches

Back in October, my daughter questioned me on what we'd be doing for Leif Ericksson Day. She asked me since I really get into off-beat holidays. However, I didn't realize it was really a day! Now I know that it is, I have been researching viking & Scandinavian foods, amongst other things, to add to our holiday & foodie repertoire. 

I've also been quite drawn to the Nordic designs on sweaters & things...so I began to look into the culture of their Christmastime rituals, too.

Quite some time back, I learned a cheater shortcut to making easy Danish-style pastries & added my own twist (recipe HERE), which I also recreated some Love Danishes to follow up my New Year's Ham & Beans (recipe HERE).

In my researching...I noticed that simple open-faced sandwiches are kind of a staple. And I've been wanting to try some. So I had hoped to serve some up for some company coming over...

One of the things I did not get to do, and had planned on for the non-pork/non-ham-&-bean eaters, was to make some Scandinavian-style open face sandwiches. I didn't get it done in time for the crowd that came over, but I still played with the idea later on New Year's Day. I only used hard boiled eggs for the test run. Here's what I did:

~~~~~~~~~~


SCANDINAVIAN-STYLE OPEN-FACE SCANDWICHES


Ingredients:

* sliced rye or other harder bread (even pumpernickel), crusts removed
* 2-4 hard boiled eggs, sliced
* mayo/mustard/honey-mustard
* ground mustard (optional)
* chives, fresh or freeze-dried (I used freeze-dried)
* dill weed, fresh or dried (I used dried)
* salt & pepper (optional)


Directions:

~ hard boil your eggs in the best method that works for you - I did mine in the oven (usually 325 degrees for 25-30 minutes...but wanted to speed up the process & did 375 degrees for 15...wishing I used the 325, but it was still OK), peel & slice them; set aside

~ take a slice of your bread of choice (I used Pepperidge Farms Rye) & remove the crusts, leaving the bread in a rectangular shape

~ take your condiment(s) of choice & spread onto the bread - if using mayo & want some of the mustard, sprinkle a pinch of ground mustard on top or mix it in (I used French's honey mustard AND some Miracle Whip with olive oil)

~ sprinkle on some of the chive pieces

~ take a few slices of the hard boiled egg & arrange onto the bread

~ top the egg slices with the dill, salt & pepper (I did not use the salt & pepper this time)

~ serve

~~~~~~~~~~

As I researched these sandwiches, I know there's salmon & fish involved, even veggies. I look forward to adding some salmon on them & just play with the idea more, in general!

I used the eggs & honey mustard since my daughter, the non-pork eater, likes scrambled eggs with honey mustard. She isn't fond of hard boiled yolk, apparently, so I can try the egg white rings & egg ends for hers. 

If you noticed, I made designs with my condiments & egg arrangements. They were so mod & adorable! And the rye gave it a really great flavor background.

Along with the arrangement of condiments, I even used the olive oil Miracle Whip AND the honey mustard, too.

These are fun, adorable, EASY, kiddos can help assemble these things easily, and are perfect for a tea, luncheon, brunch, or part of a big ol' smorgasbord!

Pepperidge Farms also makes a rye/pumpernickel swirl sliced bread that I might want to try, too.

Oh the possibilities!!!

Side Note: My friend, Rachael, should be happy I posted this on Thorsday. hehe

ENJOY!
**********
Update:

Finally got some Rye & Pumpernickel swirl bread, along with some smoked salmon & shrimp...


It's the swirl bread with Miracle Whip, honey dijon mustard, pickle relish, a hard boiled egg (sliced), shrimp, smoked salmon, dried dill (sprinkled) & sprigs of baby dill. So pretty, amm-i-rite?


Served it up as a traditional-style Scandinavian lunch with strawberries.
So beautiful...
So yummy...

And I also tried this, too:


Pumperye (yeah...I just named it that) with Miracle Whip, honey dijon, pickle relish, kale (massaged in lemon juice & sea salt), smoked salmon, cocktail shrimp, freeze-dried chives, dried dill & a sprig of baby dill plated along with sliced strawberries & lingonberry fake-out pastry roulade pastry slices.
YUMMY!!

Wednesday, January 1, 2014

New Year's Ham & Beans

Happy New Year, everyone! Looking forward to a brand new start...

And, to start the new year, we decided to take in some of the long-standing traditions. In case you need a reminder of what some of the mainstays are, here you go:

= black eyed peas - to bring you luck in the new year for nourishment & survival

= pork - pigs are the animals who root forward while they eat & are associated with their girth size; symbolized moving forward in the new year & prosperity 

= greens - to bring you money in the new year

= cornbread - the color of gold

= round foods - the shape of coins, in hopes of bringing money


Well, I incorporated all of these things in our noon-day meal for New Year's Day! One dish to cover all of this? Perfect!
What might have been that perfect dish? It's my Lazy-Cooker Ham & Beans (my original recipe HERE), but with a twist. I kind of touched on it in the original post, but here's what I ended up doing:
~~~~~~~~~~

NEW YEAR'S HAM & BEANS


Ingredients:

~ 1-3 lbs. ham, cubed or chunked (the pork)
~ 1 bag dry beans (I use the 15 bean mix), soaked, drained & rinsed
~ 2-3 cans white beans (Northern, Navy, Cannelli), drained & rinsed
~ 1 can black eyed peas (tradition covered), drained & rinsed
~ 32 oz. chicken broth
~ 1/2 C apple cider
~ 1/4 C lemon juice
~ 2 T liquid smoke
~ 2 T honey
~ 2 celery stalks, rinsed & chopped
~ 2 carrots, rinsed & sliced (left in rounds...for the coin shape)
~ 1 parsnip, rinsed & sliced (left in rounds...for the coin shape)
~ half to 1 whole sweet yellow onion, chopped
~ 1 large kale, cabbage, collard greens, Swiss chard leaf (or more - green of choice), rinsed, spine removed & chopped (greens tradition); massaged in ground sea salt & a tsp lemon juice (may add more greens if desired)
~ 2 handfuls brown sugar
~ handful minced onion (optional)
~ handful smoked paprika
~ handful cinnamon
~ handful garlic powder
~ handful dried parsley
~ sprinkle chili powder
~ sprinkle allspice
~ sprinkle McCorrmick's Smokehouse Maple seasoning
~ 1-2 pinches ground cayenne pepper or red pepper flakes (optional if more heat desired)
~ 2 bay leaves


Directions:

* soak dry beans in enough water to cover the beans by 1 & a half inches over for about 8 hours

* when beans have soaked appropriately, drain, rinse & discard any pebbles

* spray the lazy cooker insert with cooking spray, then add the beans (not canned) & ham

* pour in the chicken broth, apple cider, lemon juice, liquid smoke & honey

* add in the veggies except the greens of choice

* add in the spices except the bay leaves

* give the mixture a really good stir

* pop in those bay leaves & close the lid

* either set the lazy cooker on high for 4-5 hours
OR
set the lazy cooker on low for 8 hours (if wanting for lunch, so do all of this before bed after you've toasted in the new year)

* remove the bay leaves, add in the canned beans, give a good stir, add the bay leaves back in & close the lid

* set lazy cooker on low for 4 more hours

* in the last 20-45 minutes, remove the bay leaves & discard, then add in the greens, stir & close lid

* give one more really good stir, ladle into bowls & serve with cornbread

~~~~~~~~~~

Since we were serving this for lunch on New Year's Day, I started soaking the dry beans at lunch the day before, then started getting everything assembled & started after we toasted in the new year (as a tip: I would have everything already sliced, chopped, cubed, etc. so that you are not trying to do all of the slicing, chopping, cubing, etc. with a champagne buzz at 1:00 in the morning). The beans & ham were cooking for about 12 hours, total. When I got up in the morning, things were smelling like ham & beans, and I got to go right into the last steps.

We had a get-together to start out the new year with great friends...so I doubled this recipe. Yep! I had two lazy cookers going! But I'll tell you what...not everyone showed up and we went thru 1 whole lazy cooker & half of the other one. Many got seconds, too!

If you have someone who cringes at the thought of consuming black eyed peas &/or the greens...you could not taste a difference in this version from my original one! My hubby is not fond of black-eyed peas OR the kale/greens. He is one that got seconds!

And...it was perfect for the super cold day that set it while it filled us up for the rest of the evening.

I also had the whiners covered: I had my daughter make up some cole slaw for the greens, and I made up some canned black eyed peas with a stick of butter, a handful of brown sugar & some [turkey] bacon bits (had to be fake pork due to my non-pork eater).

For something a bit sweeter, I made cheater Danish pastries (my variation of the recipe HERE, but used the original recipe) & added a strawberry half to the top to resemble a heart to bring love in the new year.

bowl of ham & beans with black eyed peas & kale
served with cornbread
and shown with Love Danish Pastries

What a great start to the new year! I think we may have found a new tradition in these traditions! And they were delicious!

Hope this inspires you to keep up & find ways to work in these traditions...even if you have whiners. 

ENJOY!